

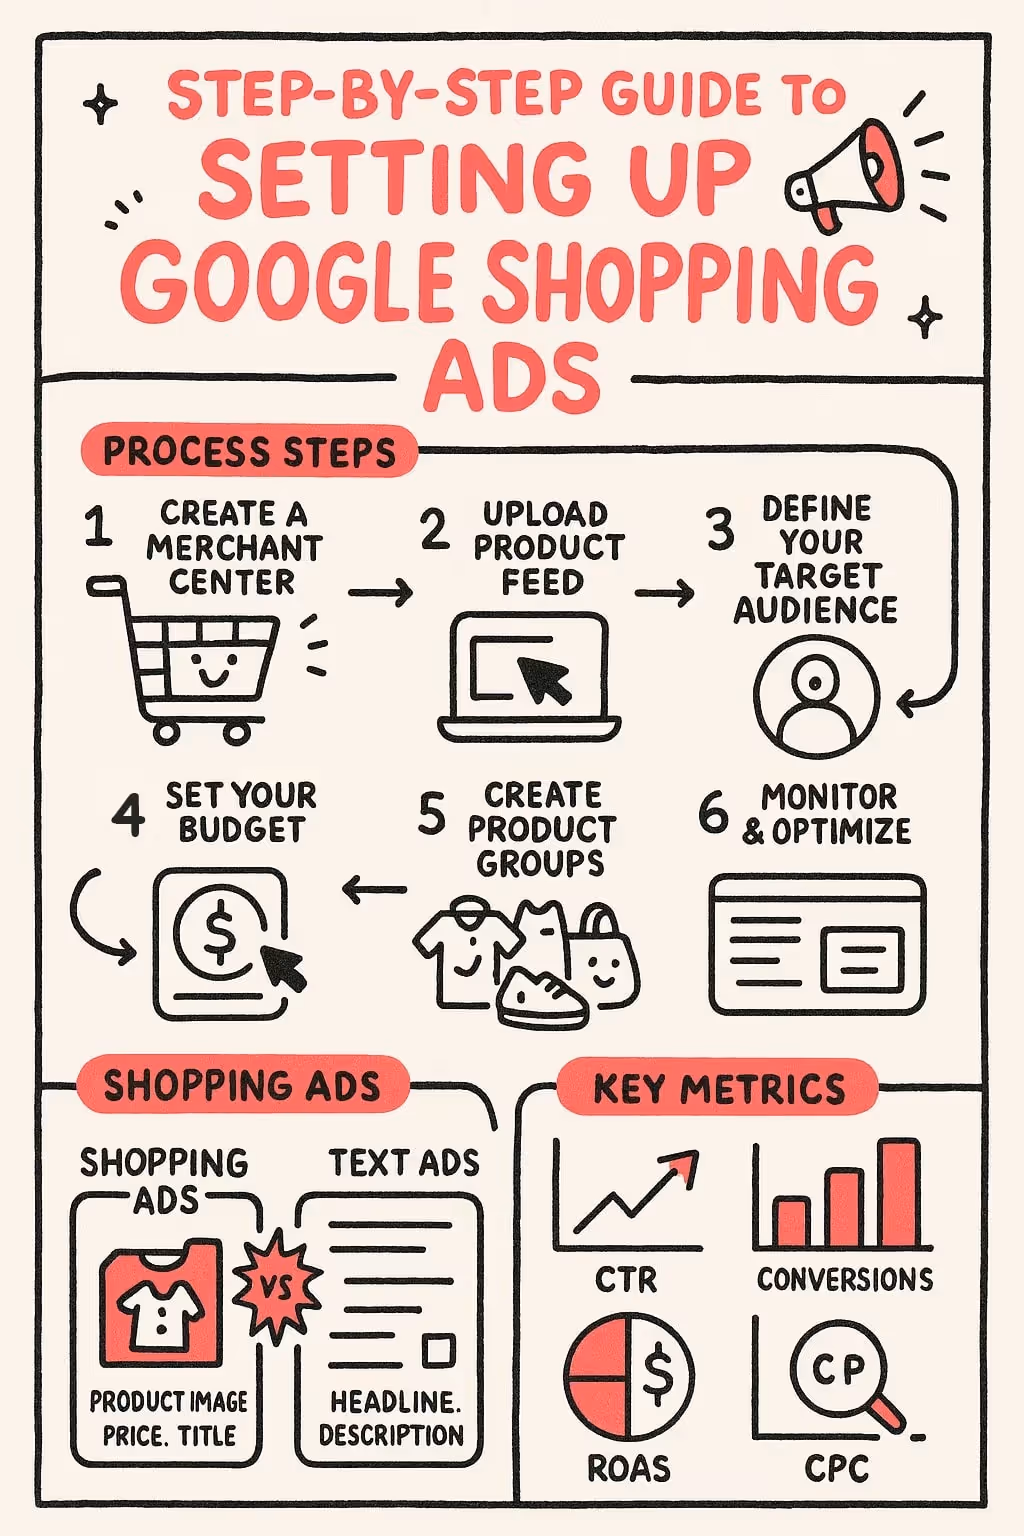
Google Shopping ads get attention fast because shoppers see an image, price, and your store name right in the search results and the shopping tab. For beginners, the setup can look complicated, but it becomes easy when you follow the steps in order. This guide shows exactly how to do it.
Many e-commerce stores use Google Shopping campaigns to drive better website traffic and sales because the ads are visual and product-focused. The key is setting up the Google Merchant Center correctly, submitting a clean Google Shopping feed, and then building campaigns inside your Google Ads account with the right campaign structure and bidding strategy.
By the end, you will understand how to launch Shopping ads and what to check if something goes wrong. Each step builds on the previous one, so you can move forward without confusion.
Google Shopping ads display your products directly in search engine results pages. Unlike traditional text ads, they show product images, price, and store name automatically. Google decides when to show your shopping ads based on your product data.
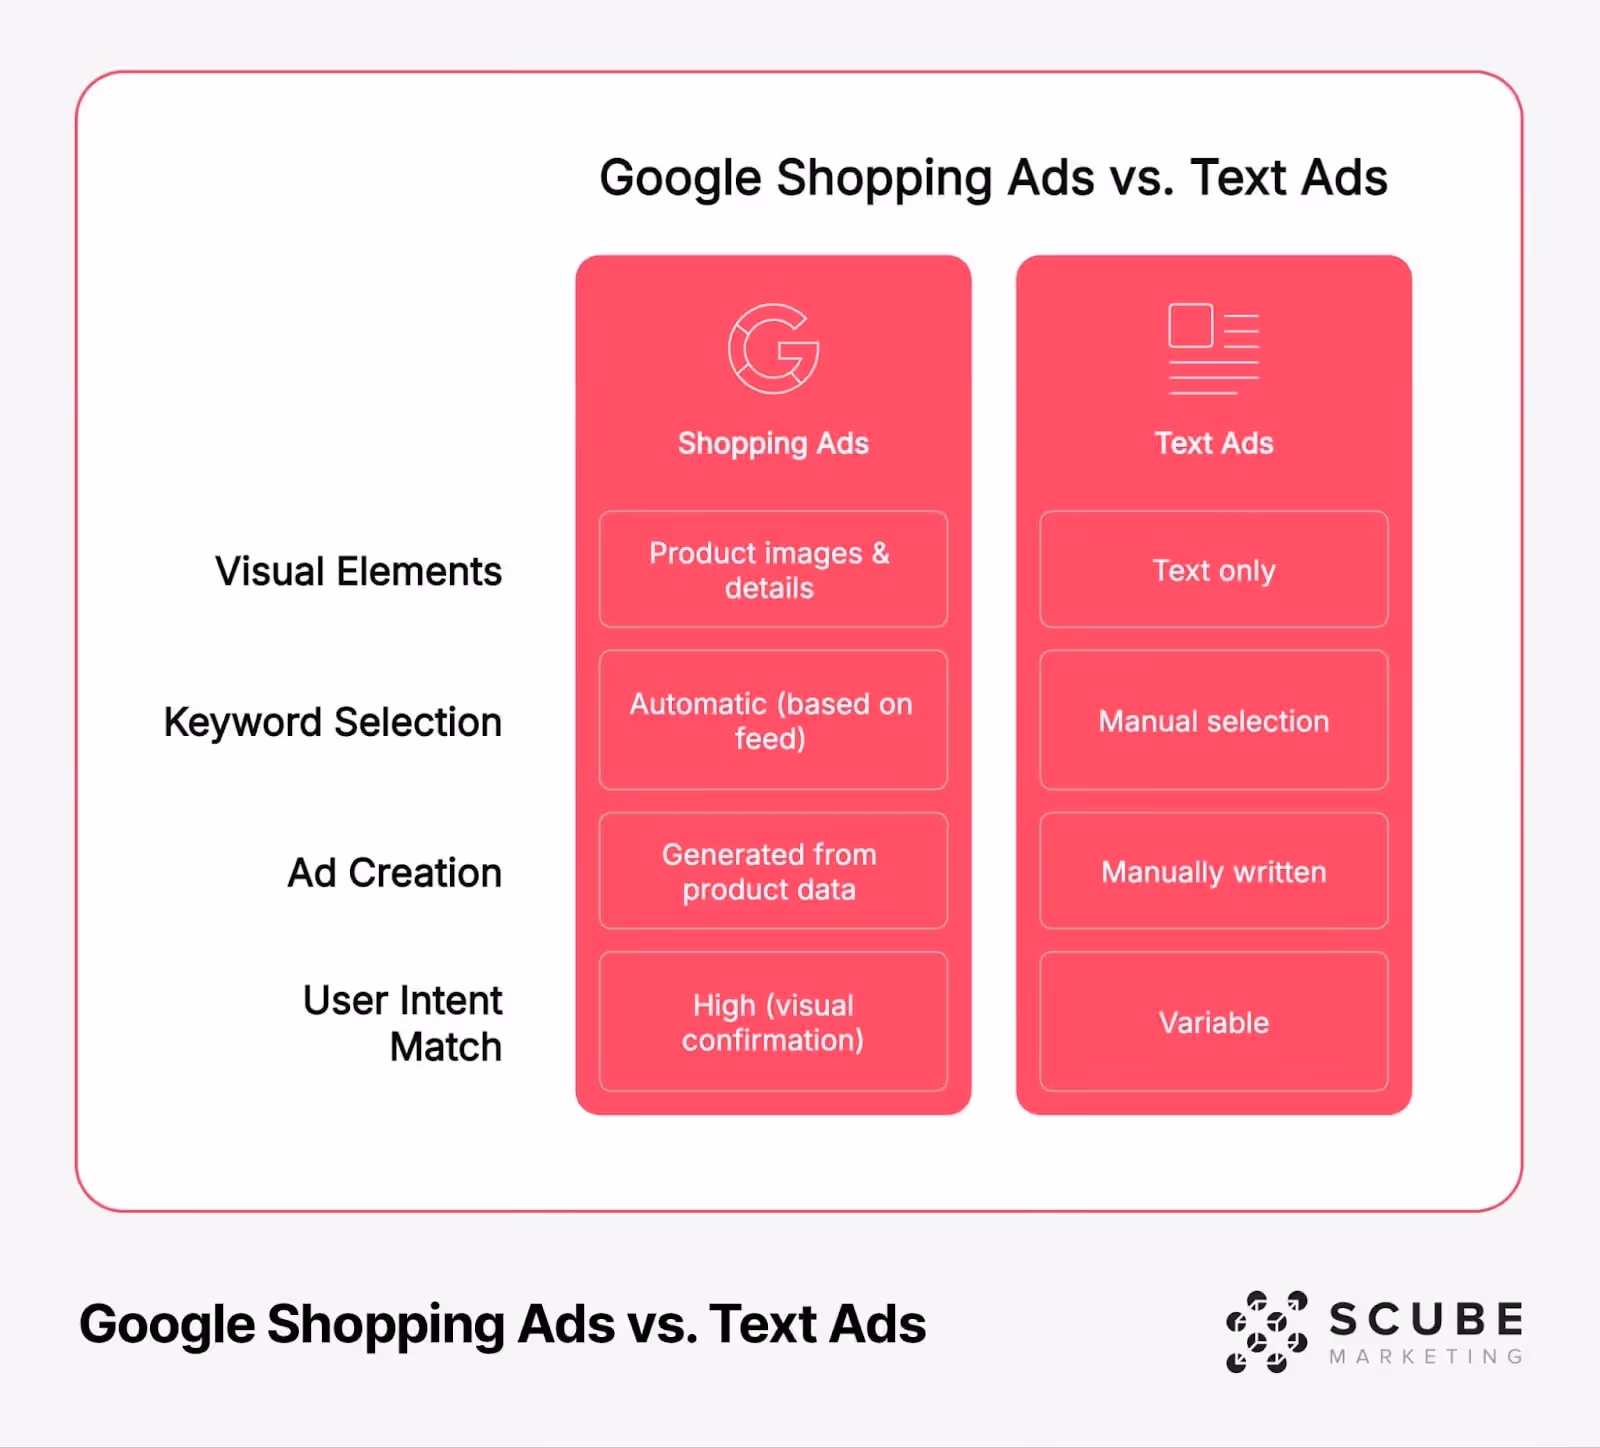
Shopping ads do not work like standard search ads, where you manually choose keywords. Instead, Google matches your products to search queries using your product feed and product attributes. This is why product feed optimization and clean product data feed setup matter so much.
If your data is accurate, Google can match you to relevant search queries and avoid showing your products for generic searches that waste budget. Better data also helps you improve Google Shopping optimization over time because the system understands what you sell.
This is why Shopping ads often perform better for e-commerce. Shoppers see what they are getting before clicking, which improves intent and supports a healthier conversion rate.
Shopping ads help e-commerce stores stand out because they show product details upfront. Shoppers can compare prices, images, and store names quickly, which usually means fewer wasted clicks and more qualified traffic.
They also support a broader reach because Google uses your feed to match you with more search terms. If your titles and attributes are strong, you can appear for more relevant searches without building large keyword lists manually.
Over time, Shopping ads can improve return on ad spend because you can make decisions using real performance data. You can see what products drive sales, where the budget is being wasted, and what needs a better feed setup.
For brands managing large catalogs where that analysis needs to happen at scale, working with a Google Shopping agency that handles feed structure and campaign management together makes that compounding effect happen faster →
To start, you need an active Google Ads account and a Google Merchant Center account. Merchant Center stores your product feed, and Google Ads runs the shopping ad campaigns, budgets, and bidding. This setup forms the foundation for managing product listings and understanding how to optimize Google Shopping ads effectively as your campaigns begin generating data.
Your website also needs to meet policy requirements. Google looks for transparency, security, and a smooth shopping experience. A missing returns policy, unclear contact details, or a weak checkout experience can delay approvals.
Make sure your store is ready before uploading products. This prevents common issues that slow down setup and helps you avoid early disapprovals.
Your website plays a big role in whether products get approved and how well ads convert. Google checks product pages for accurate price, availability, and clear details. If information is missing or inconsistent, you may see disapprovals or lower performance.
Checkout security is required. All transaction-related pages should use HTTPS to protect customer data. If checkout is not secure, Shopping ads may not be approved.
Mobile matters too. Many buyers browse on phones or tablets, so product pages must load fast and work cleanly across screen sizes. Poor mobile experience often leads to lost sales even when ads get clicks
The merchant center is the foundation of Google Shopping. It stores your Google Shopping product data and connects it to Google Ads. Creating a Google Merchant Center account is quick, but each setup section must be completed properly.
Start by entering business information like store name, country, and time zone. Then verify and claim your website. Verification proves ownership, and claiming will link the domain to your Merchant Center.
After that, configure tax and shipping settings. These settings affect eligibility and how products appear. Finally, review Google Merchant Center diagnostics to catch errors early and fix issues before launching campaigns.
Ready to go deeper? Read the complete auto parts marketing and ecommerce guide →
Verification failures are common when setting up a Google Merchant Center account. If the HTML tag method does not work, try a different option like Google Analytics or Google Tag Manager. In many cases, the tag is placed in the wrong section of the site, removed by a theme update, or blocked by caching. Switching verification methods often solves the problem quickly, especially if Analytics or Tag Manager is already installed and active.
Domain claim issues usually happen when the website was claimed by an older Merchant Center account. This can occur when a previous agency, employee, or developer set up Merchant Center in the past. When the domain is already claimed, Google will not allow a new account to claim it until ownership is resolved. The best approach is to identify the account that holds the claim and release it if possible. If that is not an option, Merchant Center support can guide the process, but it is better to fix this early so it does not delay your Shopping ads launch.
Policy violations are another common roadblock. Most of the time, they are related to missing contact information, unclear return and refund policies, or a checkout process that is not secure. Google expects transparent business details and a safe user experience. Fix the website first, then check Google Merchant Center diagnostics again to confirm the warnings are gone. Once diagnostics show clean status, products are more likely to be approved and start appearing in search results.
Your shopping feed is the data file that powers Shopping ads. Google uses this data feed to understand products and match them to search results. The quality of this feed directly affects performance, visibility, and approval rates.
Each product needs required attributes like item id, title, description, link, image link, availability, price, and brand. Optional fields like GTIN improve matching because product identifiers help Google recognize the exact product.
You can build the feed manually for small catalogs, but most stores use automated feed tools. Automated feeds help keep prices and availability updated, which prevents disapprovals and supports stable performance.
Product titles can make or break Shopping performance. Put the most important details early so you show up for specific search queries. A clear title structure improves relevance and reduces mismatched traffic.
Images matter because Shopping ads are visual. Use clean, high-quality images that show one product clearly. Avoid overlays, watermarks, and blurry photos because they reduce trust and may break policies.
Keep descriptions factual. Add features, materials, sizing, and technical details when relevant. Avoid sales language inside descriptions because Google expects product facts.
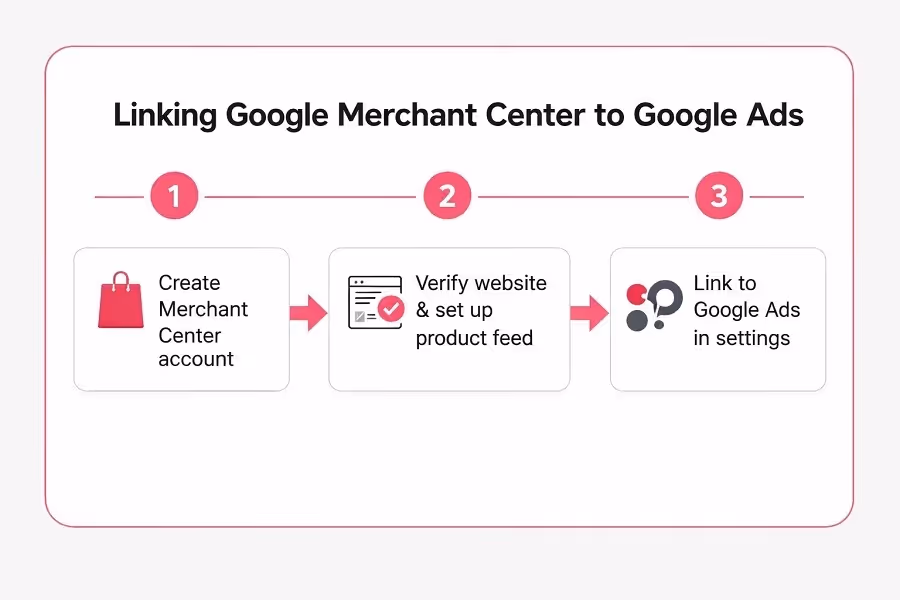
Linking your Google Merchant Center to your Google Ads account is the step that turns your product feed into real Google Shopping ads. Until the accounts are connected, you cannot build shopping campaigns or show product ads in the search results and Shopping tab. This link is also important for tracking campaign performance, controlling ad spend, and using your feed for better Google Shopping optimization
Start inside Merchant Center. Open the settings menu, go to Account linking, and choose Google Ads. Enter your Google Ads customer ID and send the request. Make sure you are linking the correct Google Merchant Center account, especially if you manage more than one store or client. After you send the request, move to Google Ads and approve the link in the Linked accounts section.
When the connection is active, your product data becomes available to create google shopping campaigns. You can then set up your campaign structure, build ad groups, and split inventory into product groups based on product type, brand, or custom labels. This is what gives you control at the ad group level and helps avoid wasted ad spend caused by broad targeting. It also helps Google match your products to relevant search queries using your product attributes, product titles, and other feed details.
If linking fails, it is usually because of permissions. Confirm you have admin access on both platforms. Also check that the Google Ads ID is correct and that the request is accepted in the right account. If the status still shows pending, review Merchant Center notifications and recheck the linked accounts screen in Google Ads. Once linked, you are ready to launch Shopping ads with a clean feed and proper control.
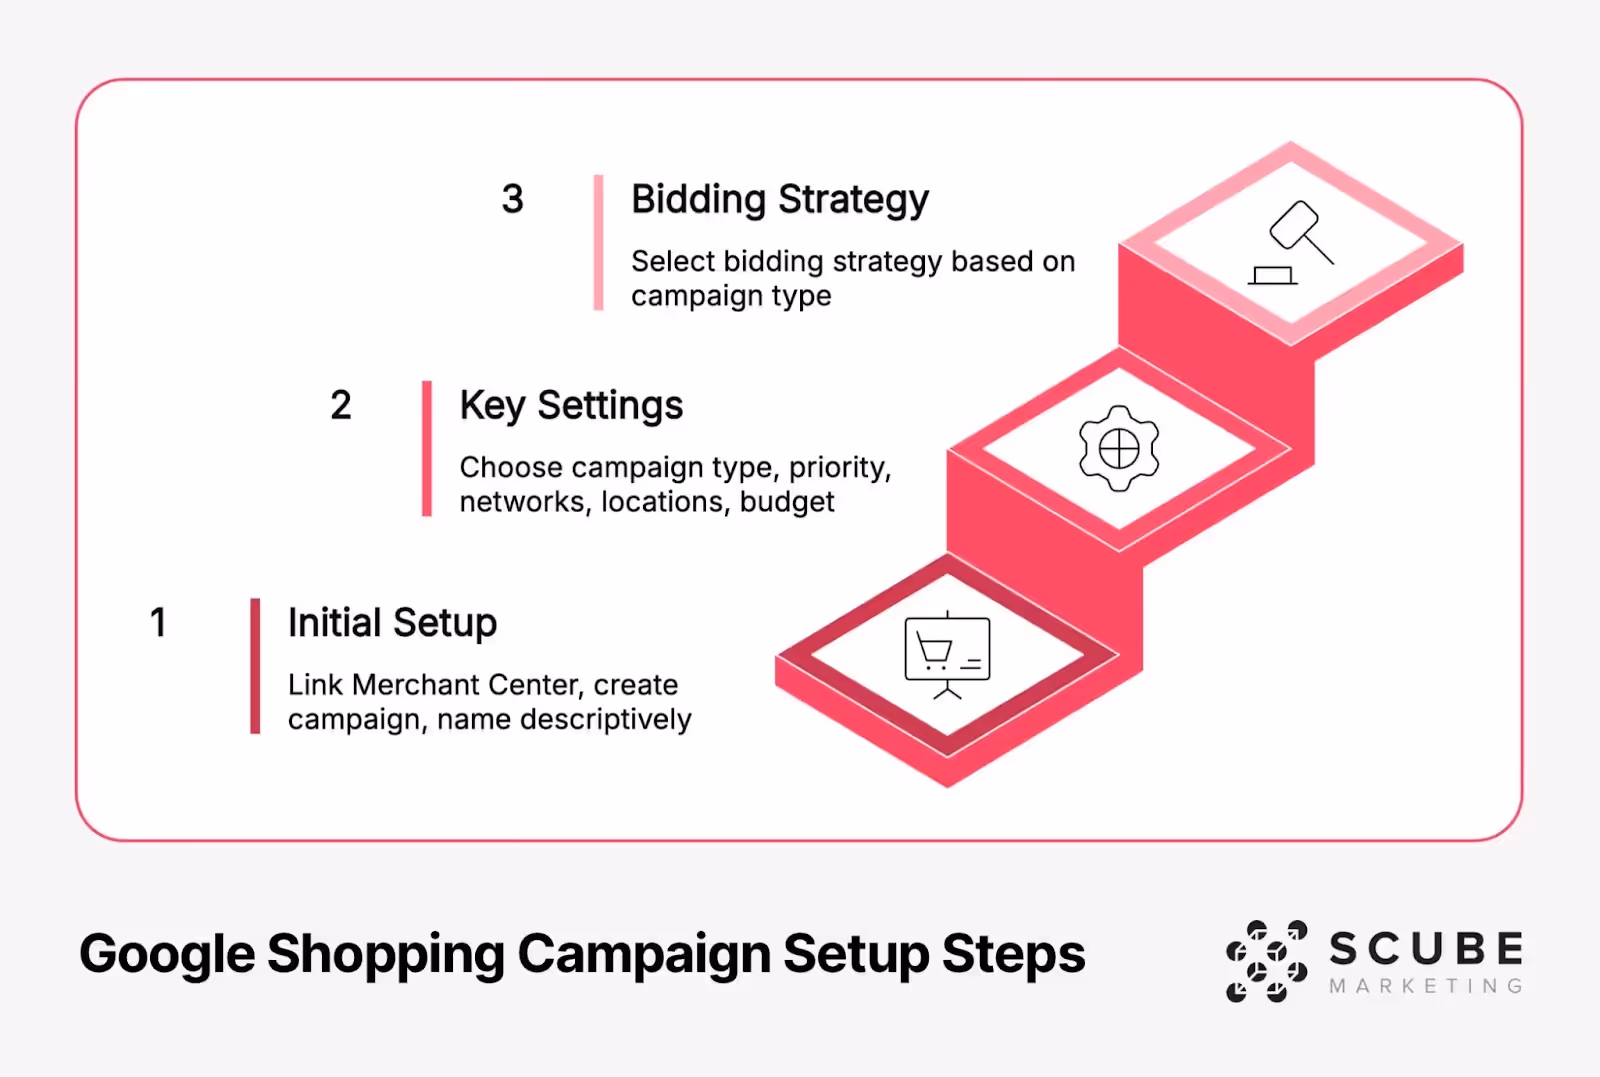
A Shopping campaign controls where your product ads appear, how your budget is used, and how Google matches products to search queries. Your first setup matters because it sets the baseline for campaign structure, targeting, and how efficiently you spend ad spend. With the right settings, you reduce wasted ad spend and increase return on ad spend over time.
In your Google Ads account, go to Campaigns, click the plus button, then choose a new Shopping campaign. When prompted, connect your Google Merchant Center so Google can pull your product data, including your Google Shopping product data from the product feed. This connection is what powers your Google Shopping campaigns.
Name the campaign clearly so it stays easy to manage later. Use a format that includes category and type, such as “Electronics Standard Shopping” or “Performance Max Consumer Electronics.” This naming helps when you have multiple shopping campaigns, different bidding goals, or special offers like flash sales.
You will typically choose between standard shopping and a performance max campaign. Standard Shopping gives more control over search terms, product group bidding, and reporting. Performance Max, also called performance max, uses automation and can show ads across multiple placements. Beginners often start with Standard Shopping, then test Performance Max after collecting solid performance data.
Your bidding strategy decides how aggressively your ads enter auctions and how budget is spent at scale. Google offers manual and automated bidding strategies, including smart bidding, which uses signals to find the best auction moments. Choosing the right approach depends on how much conversion history you already have.
For new campaigns, starting with Maximize Clicks or manual CPC can help collect early data and build a baseline. Once you have enough conversions, you can move to Maximize Conversion Value or Target ROAS, which focuses on return on ad spend. A Target ROAS goal tells Google to aim for a specific revenue return for each dollar of spend.
If you are running a performance max campaign, smart bidding is built into the system, so feed quality, pricing, and product segmentation become even more important. Either way, review results after two to four weeks, then adjust based on what the data shows.
Product groups control how products are split inside your Shopping campaign and how bids are applied. By default, Google places everything into one “All products” group, which is usually too broad. When everything has the same bid, strong products and weak products compete for the same budget.
A better approach is to split products using categories, brand, or product type. This gives clearer visibility into what drives results and helps you manage bids with more precision. Over time, this improves campaign performance because the budget can be shifted toward what sells.
For deeper control, use custom labels in Merchant Center. Custom labels help segment inventory by margin, season, best sellers, or sale items. This is also useful for pricing changes and pricing strategies, especially when promotions affect demand.
Grouping by item id is the most detailed approach and works well for top sellers. It lets you set bids for specific products based on results, rather than averaging performance across a whole category. This can be helpful when a few items drive most of your revenue.
You can also group by brand, price range, or performance patterns. Higher-priced products may support higher bids if margins allow. Once you collect performance data, adjust bids based on winners and reduce bids on products that drive clicks but not sales, which protects budget and reduces lost sales.
Negative keywords help stop Shopping ads from showing on irrelevant searches. Even though Shopping campaigns do not use keyword targeting the same way as search ads, you can still block terms that waste budget. This improves efficiency and helps you focus on relevant keywords and buyer intent.
Use the search terms report to find waste. After the campaign runs for a week or two, review the search terms and identify irrelevant or low-intent phrases. Then start adding negative keywords to block those searches. This is one of the fastest ways to fix wasted spend from broad matches.
Add negatives at the campaign level when a term is always irrelevant. Add them at the ad group level when the term only harms one product group. This helps you leverage negative keywords without cutting off good traffic across the entire campaign.
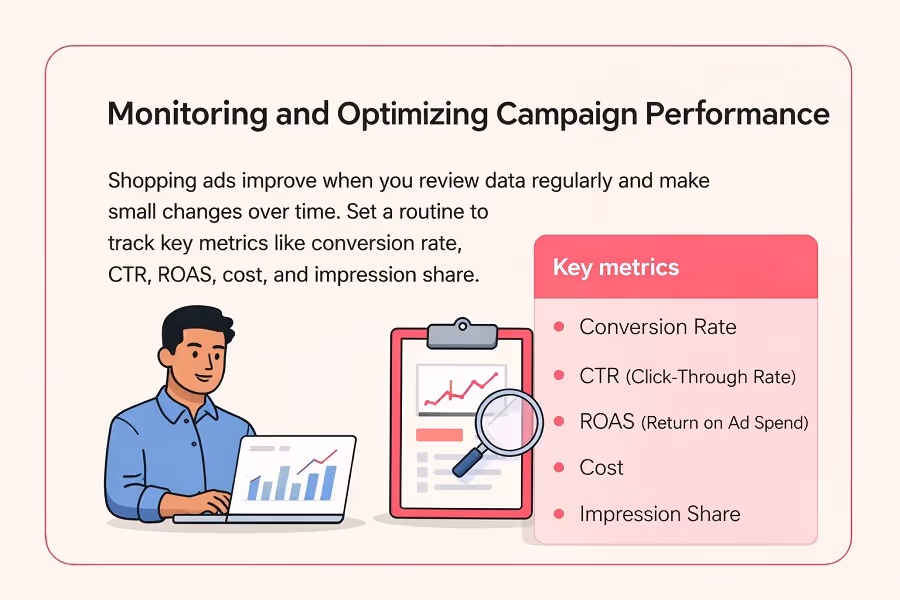
Shopping ads improve when you review data regularly and make small changes over time. Set a routine to track key metrics like conversion rate, CTR, ROAS, cost, and impression share. Use the search impression share metric to see how often you show compared to your available opportunities.
Monitor Merchant Center for feed issues and use google merchant center diagnostics to fix disapprovals quickly. A few disapproved items can reduce reach, especially if they are high-volume products. Also review your feed for missing product attributes, incorrect product identifiers, or weak product titles that are limiting match quality.
Use the Search Terms Report to keep tightening traffic quality. Over time, this reduces wasted clicks from generic searches and improves how you show for specific search queries. Small improvements here often lead to better ROAS without increasing spend.
Competitive reports help you understand why performance changes. Auction insights show who appears next to you, while competitive metrics like impression share tell you if budget or ranking is limiting reach. If you are losing visibility, look at feed quality, bid strategy, and whether your prices remain competitive.
Also check the absolute top impression share if the goal is to dominate key product searches. This metric helps identify when your ads appear at the very top, which can matter for high-intent products and big sale periods.
Most Google Shopping ads problems start in the feed. Missing product attributes, inconsistent pricing, weak product titles, thin product descriptions, or incorrect availability can reduce visibility fast. To optimize your Google Shopping, keep your shopping feed updated so price and stock always match the website, and make sure key details like technical specifications are accurate where they matter.
Images are another big issue. Blurry photos, text overlays, and pictures showing multiple products can hurt performance and may violate Google’s rules. Clean, clear images on a simple background usually work best because shoppers can understand the product quickly, which improves click quality and conversion rate.
Disapprovals get ignored too often. Check Merchant Center regularly and use diagnostics to spot rejected items. Fixing disapproved products quickly restores visibility and prevents lost sales. Even strong accounts see occasional disapprovals, so routine checks should be part of your optimization strategies.
Negative keywords are one of the easiest wins. Many advertisers launch Shopping campaigns and never review the Search Terms Report, so irrelevant searches keep draining budget. Regular negative keyword updates help protect ad spend and keep traffic focused on buyers, which supports better performance across your wider digital marketing efforts.
Campaign structure also matters. If product groups are too broad, you cannot control bids well, and strong products get held back by weak ones. Use a cleaner structure, clear labels, and regular reviews inside your campaign page menu so optimizations stay consistent and easy to manage.
After the basics are stable, consider testing tiered campaign priorities in Standard Shopping, or shifting certain categories into performance max to expand reach. Performance Max can work well when your feed is clean and conversion tracking is strong.
Use promotions carefully. Flash sales and time-limited discounts can lift volume but can also distort performance, so track results by label and time period. Strong pricing strategies combined with good feed structure help you stay competitive without losing profitability.
Remarketing can also improve outcomes. Reaching past visitors can increase conversion rate because those shoppers already know the brand, which can strengthen ROAS when budgets are controlled.
Google Shopping ads perform best when the setup is correct and the work is consistent. Start in Google Merchant Center, build a clean product feed, then link your Google Ads account so your products can show in the Shopping tab and search results. After that, focus on a clear campaign structure with the right shopping campaigns or a Performance Max campaign, so you can control ad spend and improve campaign performance.
Your feed stays at the center of everything. Keep improving product titles, product descriptions, images, and product attributes like product identifiers and technical specifications. Use Merchant Center diagnostics to catch issues early, and review performance inside Google Ads using reports like the search terms report and search queries data. This helps you spot generic searches, add negative keywords, and reduce wasted ad spend.
As data builds, refine your bidding strategy with smart bidding or other automated bidding strategies, and use custom labels to separate best sellers, high-margin products, and seasonal promos like flash sales. Track key metrics, search impression share, and return on ad spend to make smart decisions. With steady updates and simple optimization strategies, Google Shopping optimization becomes predictable and can drive stronger visibility, better clicks, and fewer lost sales.
Start with google shopping optimization. Fix your product feed first so price, stock, and product details match your website. Then improve product feed optimization by writing clearer titles, using strong images, and choosing accurate categories. After that, structure google shopping campaigns with clean ad groups so you can control bids by product type or margin. Review performance data weekly and adjust budgets based on what is selling.
Smart shopping campaigns can work, but they rely on automation and need clean tracking and solid feed quality. Beginners often get better control by starting with standard Shopping, then testing smart campaigns after collecting data. Once you understand which products convert, automation becomes easier to manage.
Custom labels let you group products by what matters to your business, like best sellers, high margin items, seasonal products, or clearance. This supports better optimization strategies because you can increase bids for profitable groups and reduce spend on weaker products without changing the whole campaign.
Shopping ads do not use keywords like Search, but adding negative keywords still protects budget. Use the search terms report to find irrelevant queries, then leverage negative keywords to block them at campaign or ad group level. This reduces wasted clicks and improves traffic quality.
Search impression share shows how often your Shopping ads appeared compared to how often they could have appeared. If it is low, you may be limited by budget, bids, or feed quality. Improving your product feed and campaign setup usually increases reach and helps you capture more qualified searches.